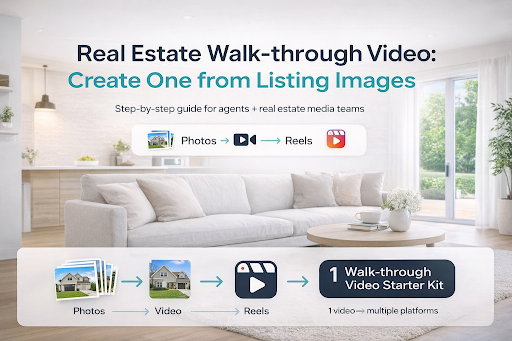
Real Estate Walk-through Video: How to Create One from Listing Images (Step-by-Step)

If you’re a real estate agent or a real estate media team, you already know this truth: buyers scroll fast. And in a feed packed with listings, static photos often don’t create enough momentum to earn that next click, save, or showing request.
That’s exactly why a real estate walk-through video has become one of the highest-performing content formats in modern real estate marketing. It helps buyers feel the flow of a home, understand the layout, and stay engaged long enough to take action, even if you didn’t shoot a single second of video footage.
The best part? You don’t need fancy gear, a gimbal, or an editing expert to create one.
If you want the ‘cinematic’ version of this exact workflow, this guide breaks down the same concept with a more stylized output.
Turn real estate photos into cinematic AI-powered videos
In this guide, you’ll learn how to create a real estate walk-through video from listing images, step-by-step, plus the best practices top-performing agents use to get more leads, more showings, and more attention online.
What is a Real Estate Walk-through Video?
A real estate walk-through video is a short, structured property video that simulates the experience of walking through a home — room by room — so buyers can visualize the space, layout, and lifestyle.
Traditionally, walk-through videos were filmed on-site using:
- A smartphone + stabilizer
- A DSLR camera
- A professional videographer
But now, many agents are creating walkthrough-style videos using listing images, turning still photos into an engaging visual tour that works beautifully on:
- Instagram Reels
- TikTok
- YouTube Shorts
- Listing presentations
- Email marketing
Why Walk-through Videos Convert Better Than Photo-Only Listings
Photos are important, but video often creates the decision-making context that buyers need.

Here’s what walk-through videos do better:
- Boost engagement: Videos keep viewers watching longer than a swipe-through carousel.
- Create flow: Buyers understand how rooms connect (living → dining → kitchen).
- Build emotional connection: Movement + pacing makes the property feel “real.”
- Increase inquiries: More time spent with the listing usually means more intent.
- Support remote buyers: Video tours help long-distance buyers shortlist faster.
In a competitive market, a well-made walk-through video isn’t just “nice to have” — pit’s a visibility advantage.
If you’re building a repeatable content engine (not just a one-off video), this 2026 video marketing guide shows what to publish and why it works.
What You Need to Create a Walk-through Video from Listing Images
You can create a strong real estate walk-through video with just:
Essentials
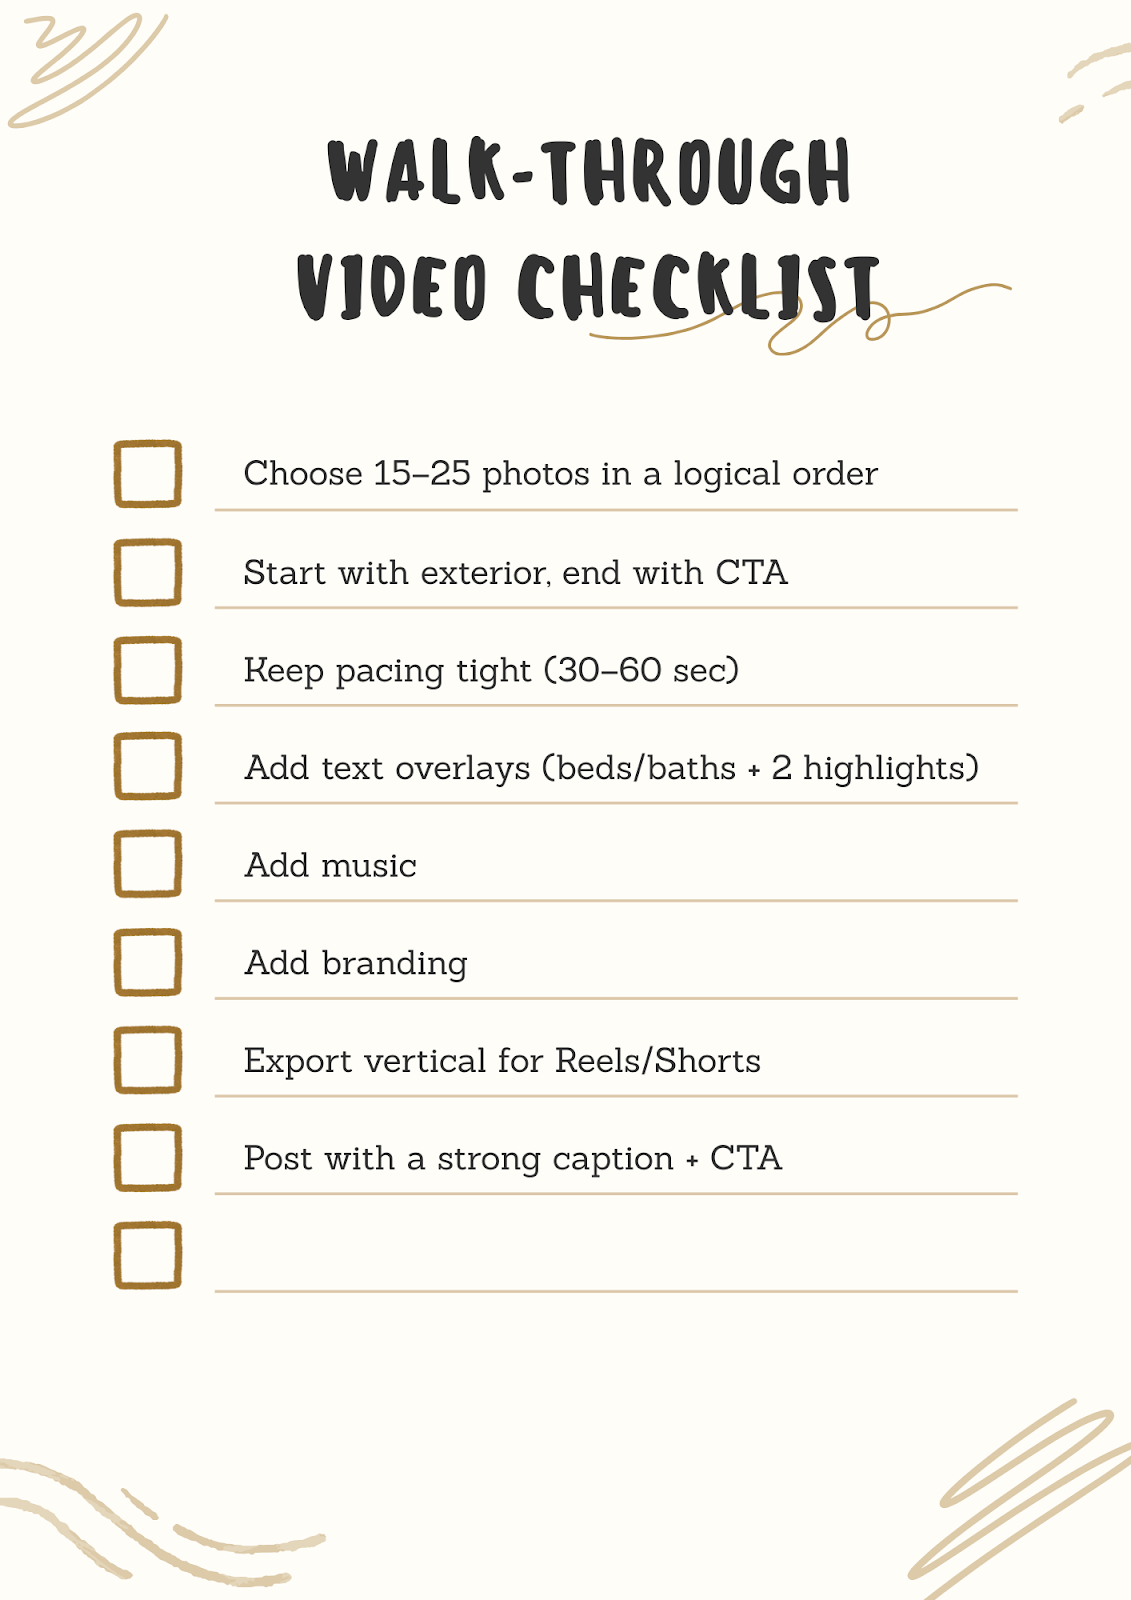
- 15–25 high-quality listing photos (interior + exterior)
- A simple narrative plan (what comes first, what comes last)
- A video creation tool that can convert images into video
Optional (but recommended)
- Background music
- Branding (logo, colors, agent name)
- Text overlays (beds/baths, highlights, CTA)
- Voiceover (human or AI)
AutoReel makes this process easier because it is designed to turn listing images into videos, with built-in templates, editing controls, captions, music, and branding support.
AutoReel also supports importing photos with one click from listing portals like Zillow and Realtor.com, which saves serious time when you’re producing content at scale.
How to Create a Real Estate Walk-through Video from Listing Images (Step-by-Step)

Creating a real estate walk-through video in AutoReel is intentionally streamlined. You’re basically doing 2 things: (1) giving AutoReel the right images in the right order, and (2) choosing a look that matches the home and the platform you’re posting on. Everything else is handled for you.
Want to follow along step-by-step? Watch this AutoReel tutorial to see how agents turn listing photos into a professional walk-through video in minutes.
Step 1: Upload your photos (or import in 1 click)
Start by uploading the listing photos.
To make the final video feel like a true walk-through (not a random slideshow), use a clean “tour order” before you upload or as you select images.
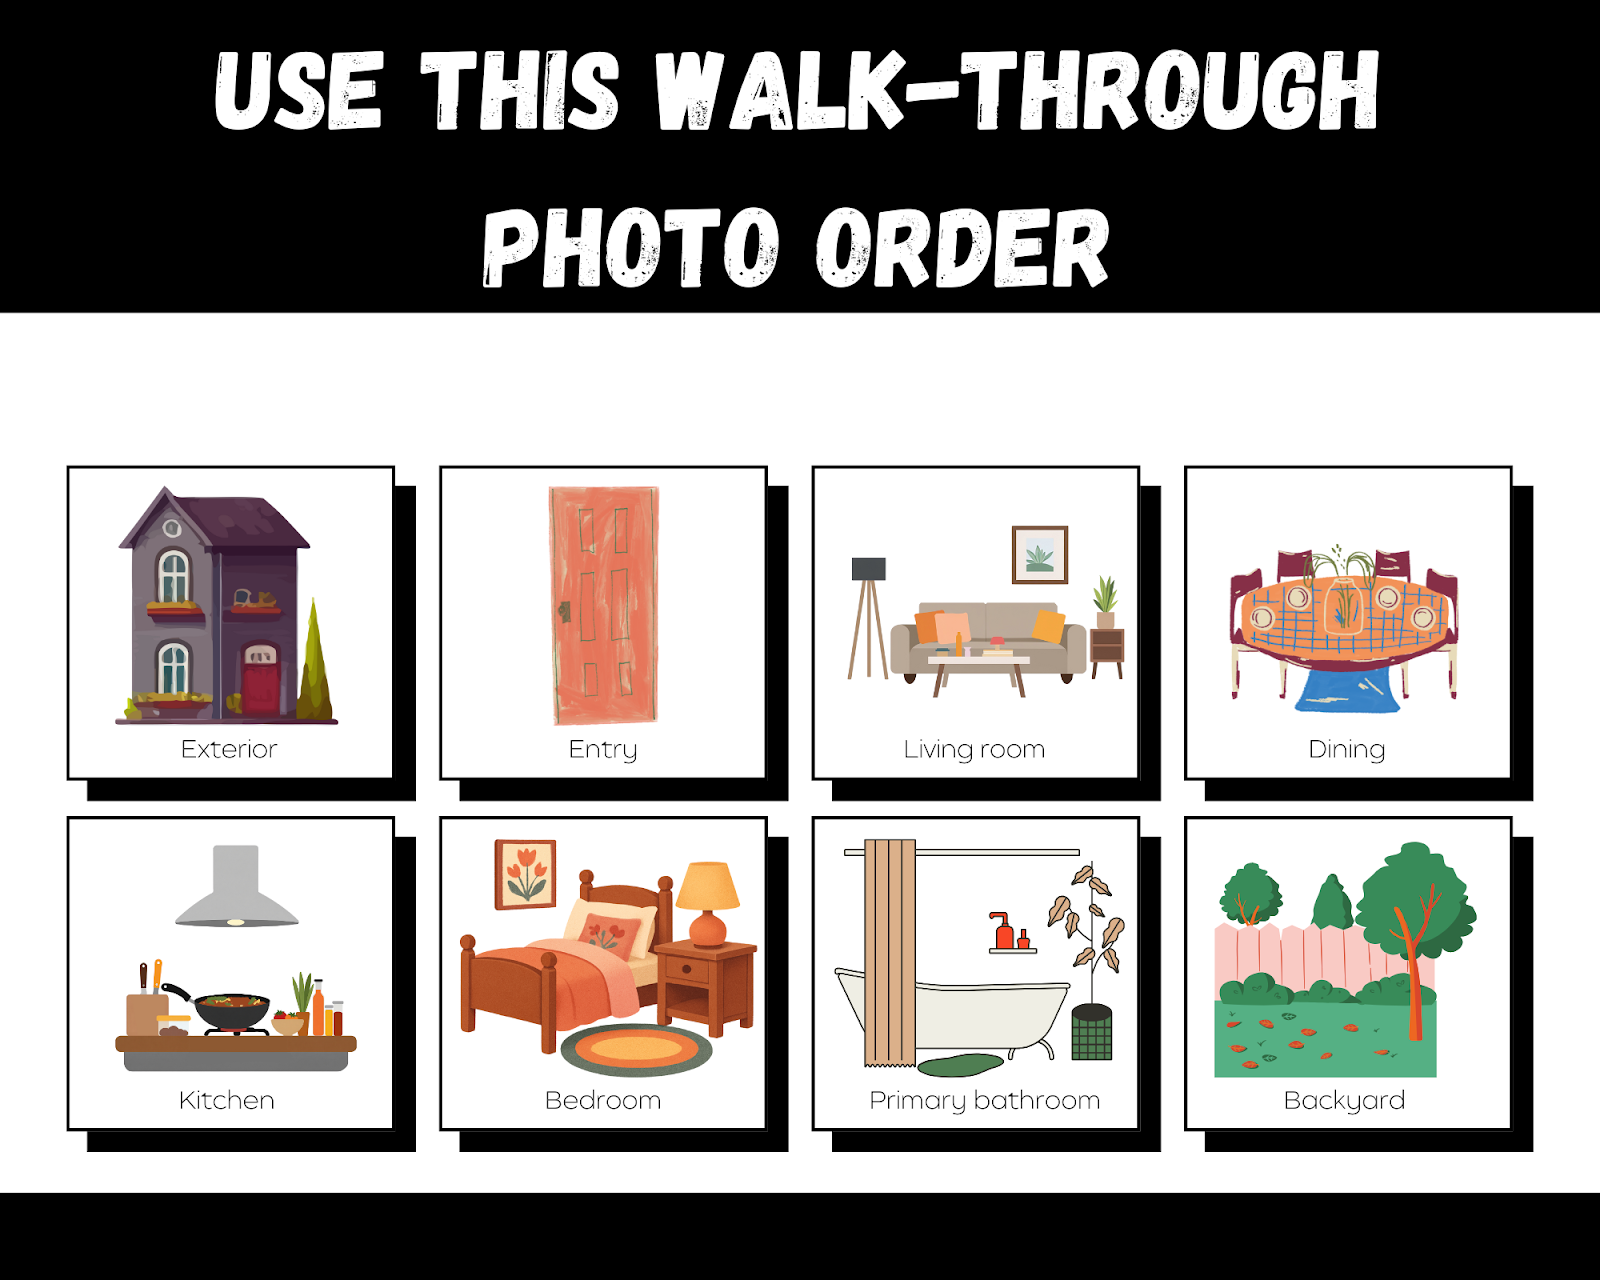
Followed by a final CTA frame (agent name, “Schedule a tour,” contact)
Why this matters: Even the best editing can’t fix a confusing story. The photo sequence is what makes viewers feel like they’re moving through the home naturally.
If a room is empty or poorly furnished, your walk-through video will inherit that problem. Virtual staging can enhance key images first, so the final video feels more ‘move-in ready’ from frame 1.
Step 2: Customize the look and feel (everything in one step)
This is the step where you make the walk-through match your brand and your audience, without slowing down production.
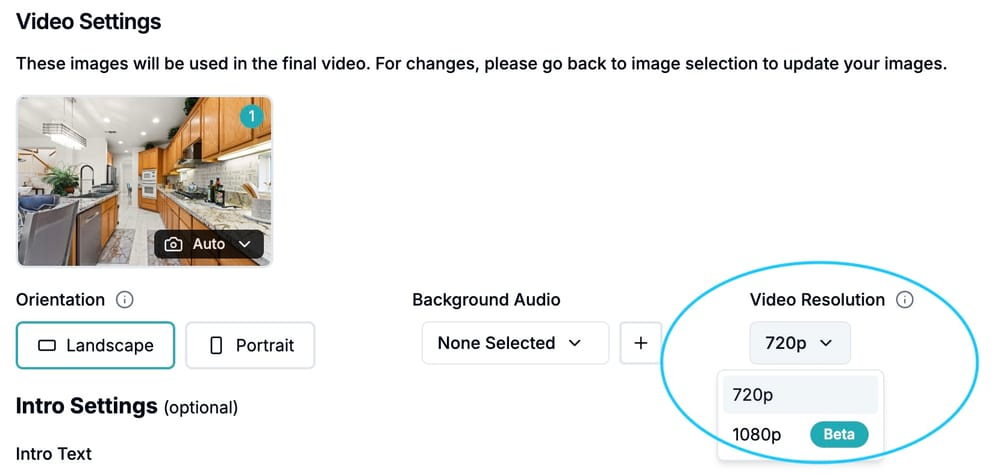
In one place, you choose:
- Orientation (vertical for Reels/Shorts/TikTok, or other formats depending on your channel)
- Captions/text style (so key info is easy to read on mobile)
- Music (to create the right emotion for the listing—luxury, cozy, modern, energetic)
- Brand elements (colors/fonts vibe so your videos look consistent across listings)
Best practice: keep captions short and punchy, like:
- “3 Bed • 2 Bath”
- “Open Concept Kitchen”
- “Private Backyard”
- “Move-in Ready” …and save the deeper details for the post caption or listing description.
Step 3: Get your polished video instantly
Once your photos and look are set, AutoReel handles the editing and generates a ready-to-post real estate walk-through video in minutes.
At this stage, your video typically already has what most agents need:
- Smooth pacing
- Clean transitions
- A consistent style
- A professional “tour” feel that works on social
Pro tip: watch the preview once from start to finish like a buyer would. If any photo feels out of place, swap it now — it’s a quick fix that can noticeably improve retention.
If one scene feels off, you don’t need to rebuild the whole video — just redo or swap the specific clip.
Step 4: Add your own style in AutoReel Studio (optional polish)
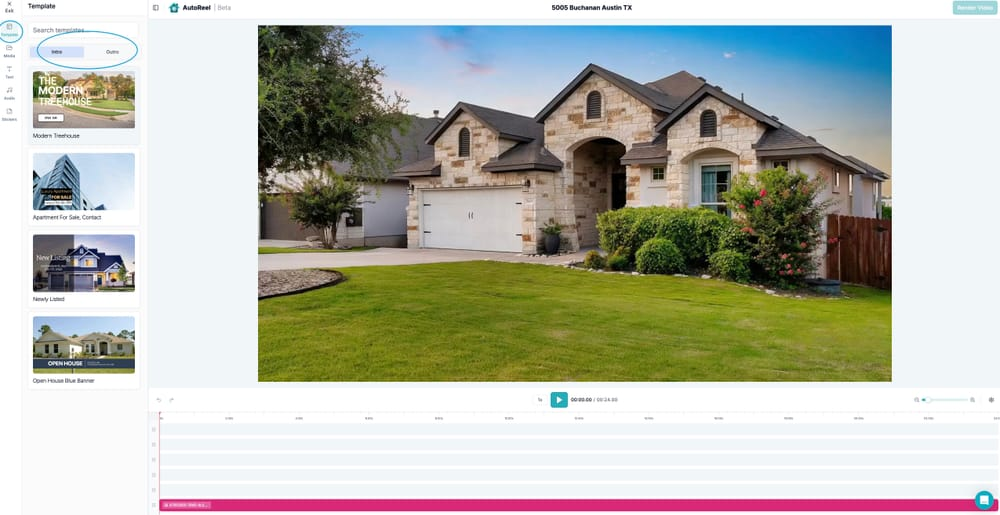
If you want the video to feel more premium or more “you,” use AutoReel Studio to add finishing touches, without rebuilding anything from scratch.
Common upgrades agents and media teams use here:
- Add a logo and consistent placement
- Add a stronger CTA end screen (“DM for price,” “Book a private tour,” “Call/Text”)
- Fine-tune text overlays for key selling points
- Make the walk-through feel signature and recognizable for your brand
This step is especially useful for teams and real estate media houses who want every video to look like it came from a consistent production system.
If you want your walk-through to feel like a guided tour without recording yourself, AI voiceovers can narrate key highlights in seconds.
Best Practices to Make Your Walk-through Video Look Professional (Even From Photos)
Here are the small details that separate “okay” from “wow.”
1) Use consistent lighting across photos
Mixed lighting makes the video feel chaotic. If any photos are too dark, fix them before creating the video.
2) Avoid repeating angles
Two photos of the same corner, back-to-back, make the viewer lose interest.
3) Add 1 “lifestyle moment”
Example: patio seating, fireplace, coffee bar, skyline view.
4) End with a strong CTA
Don’t just end on a random bedroom shot. End with action:
- “Book a showing today”
- “DM for a private tour”
- “Text ‘HOME’ to get details”
5) Post it everywhere (not just Instagram)

A real estate walk-through video should live across:
- TikTok
- YouTube Shorts
- Listing email blasts
- Your Google Business Profile posts (if applicable)
Why AutoReel is a Smart Choice for Walk-through Videos from Listing Images
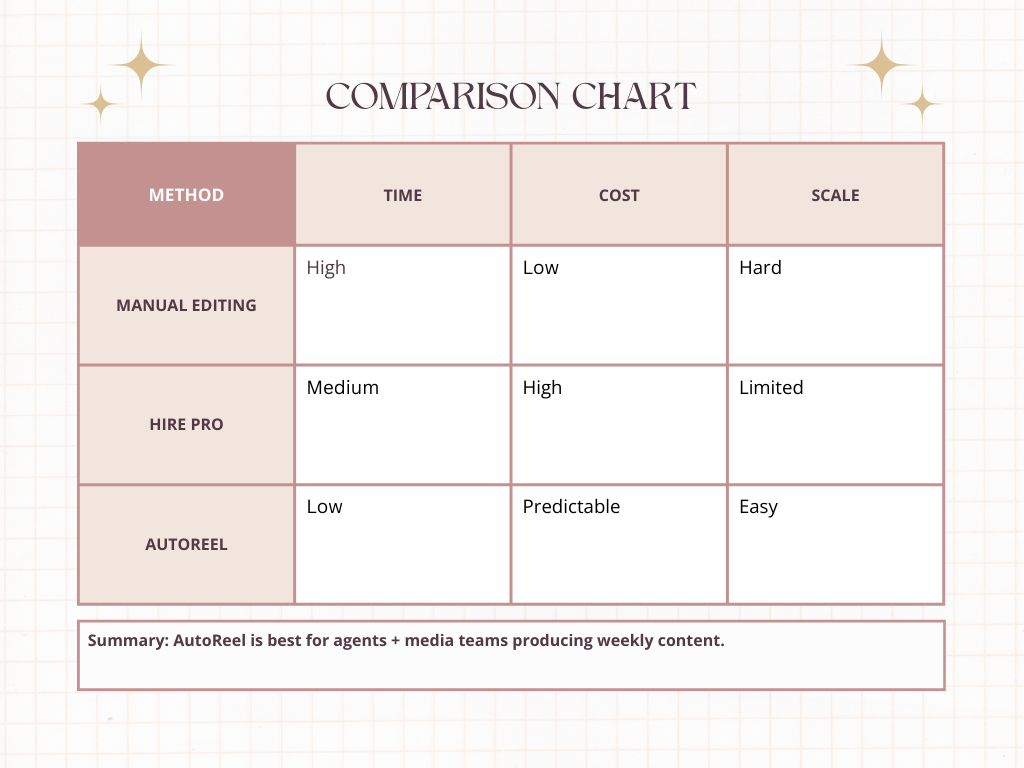
There are 3 ways to make walk-through videos:
Option 1: Manual editing
Pros: full controlCons: time-consuming, inconsistent, hard to scale
Option 2: Hire an editor or videographer
Pros: premium outputCons: expensive, slower turnaround, not scalable for daily content
Option 3: AutoReel (built for real estate)
Pros: fast, consistent, scalable, made for listingsBest for: agents + media houses producing multiple videos weekly
AutoReel is built to turn listing images into video, and the workflow supports the exact needs real estate teams care about:
- Quick creation
- Templates
- Captions
- Branding
- Music
- Editing controls in one place
- Import photos from listing portals
And when you’re posting walk-through videos consistently, that speed advantage turns into a marketing advantage.
Still deciding whether to DIY, hire a pro, or use an AI tool? Here’s a clear breakdown of real estate video production costs so you can choose the best option for your budget and volume.
Whether you’re posting 2 listings a week or producing content at scale, it helps to choose a plan that matches your workflow. See plans and pricing.
Quick Checklist: Create a Walk-through Video in 15 Minutes
Final Thoughts: Turn Listing Images Into Walk-through Videos (And Win More Attention)
A great real estate walk-through video doesn’t require a full production crew. With the right photo sequence, pacing, and a clean template, you can turn listing images into a walk-through-style video that:
- Gets more views
- Earns more saves
- Drives more inquiries
- Helps buyers visualize the home faster
And if your goal is to produce these consistently — without burning hours in editing, AutoReel is built to make that process faster, cleaner, and easier to scale across every listing you market.
If you want guidance on the fastest way to turn listing images into walk-through videos for your market, contact the AutoReel team.
FAQs
1) What is a real estate walk-through video?
A real estate walk-through video is a property tour video that shows the home in sequence—room by room—so buyers can understand layout, flow, and key features. It can be filmed on-site or created from listing images.
2) Can I create a walk-through video using only listing photos?
Yes. You can create a walk-through-style video using listing images by arranging photos in a logical order, applying transitions, adding music, and including text overlays. This is a fast option when you don’t have time to shoot video.
3) How long should a real estate walk-through video be?
For social platforms, the sweet spot is typically 15–60 seconds. Shorter videos work best for Reels and TikTok, while 45–60 seconds can work well for YouTube Shorts and Facebook.
4) How many photos should I use in a walk-through video?
Most walk-through videos perform best with 15–25 photos. Too few feels incomplete, and too many can slow pacing and reduce retention.
5) What should I include in a real estate walk-through video?
Include exterior shots, main living areas, kitchen, primary bedroom/bath, secondary rooms, outdoor spaces, and 1–2 standout features. End with a CTA like “Schedule a tour” or “DM for details.”
6) Should I add text to my walk-through video?
Yes. Text overlays help viewers understand key details quickly, especially when watching with no sound. Keep it minimal: beds/baths, 1–2 highlights, and a CTA.
7) What’s the easiest way to make a real estate walk-through video fast?
The easiest method is using a tool designed for real estate image-to-video creation (like AutoReel), where you can upload listing photos, apply templates, add captions/music/branding, and export social-ready videos quickly.